Using the Laowa 15mm macro

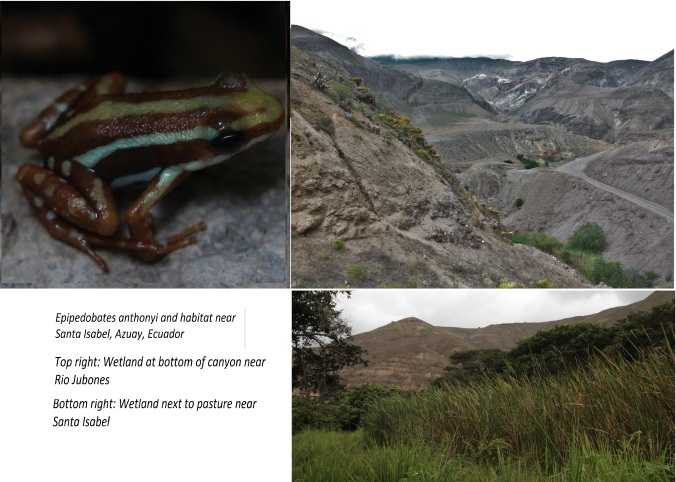
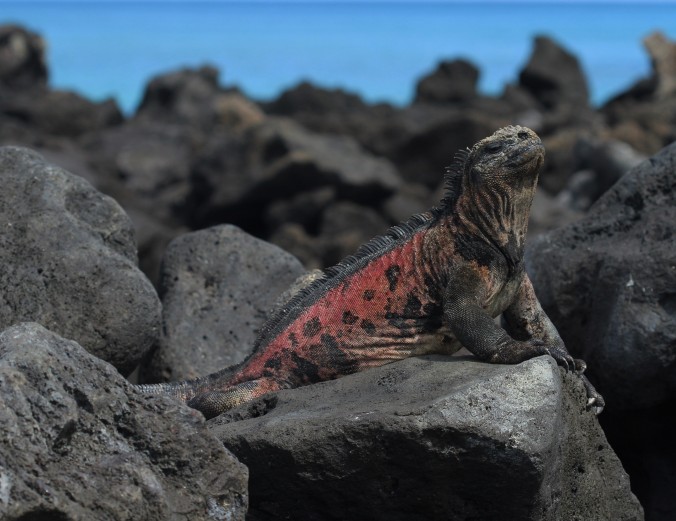
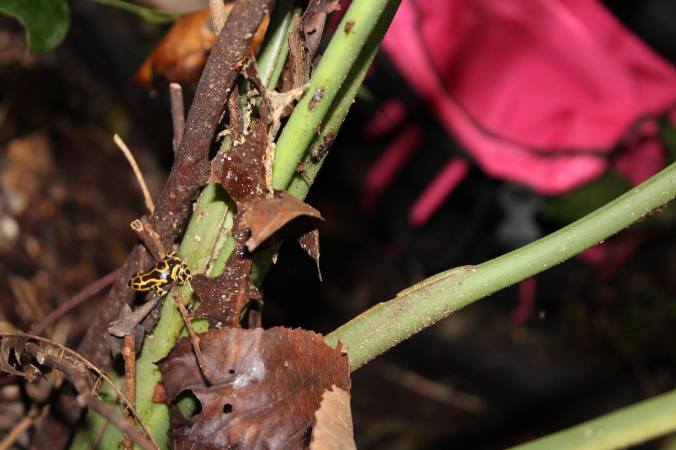
Shooting with the Laowa 15mm macro

IMG_3770

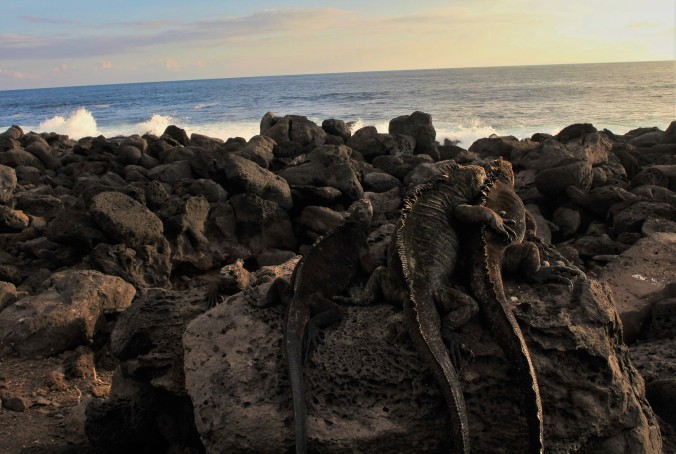
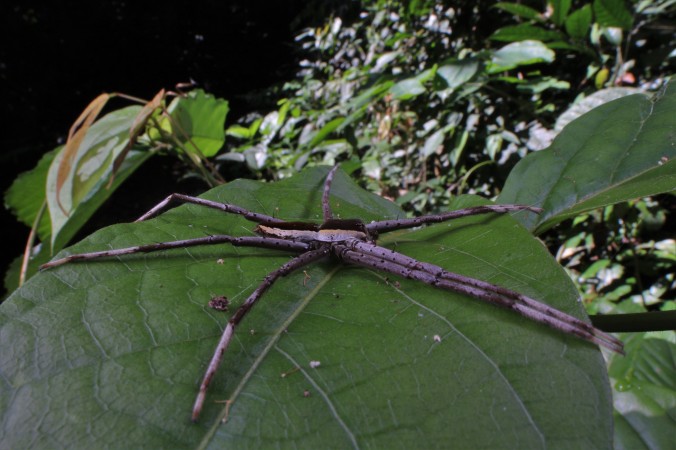
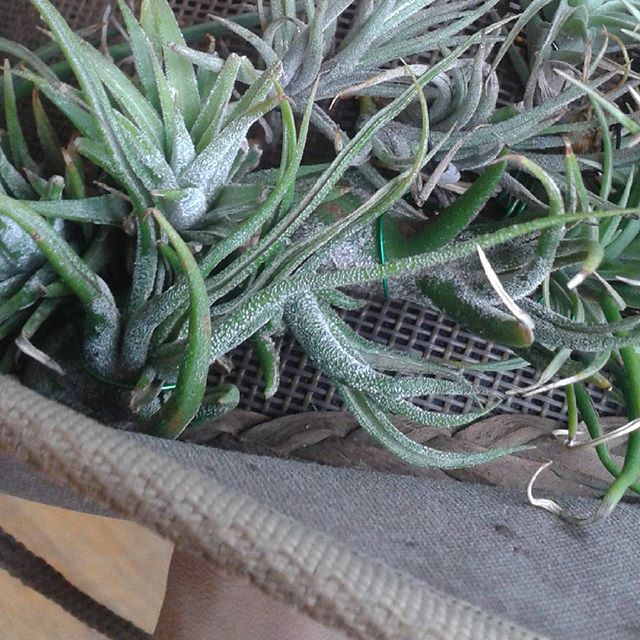
Chersina sp. likes my hat after a morning of hiking and photography. 1/30 ISO 400 F29 Laowa twin flash with DIY diffuser


I’ve had one of these lenses for nearly a year, and have been playing with it extensively. While I would consider myself a beginning photographer(it kind of began with this lens!) I hope my experiences will help people interested in wide angle macro, and this lens in particular. While it is a difficult lens to learn to use, I find the perspective and the context it gives to pictures well worth it!

Nailing focus
This lens is fairly frustrating as it is manual focus and aperture. At near macro distance, focus is fairly unforgiving, even at the smallest aperture. I have found that with this lens looking through your viewfinder is difficult at best. Maybe some of you have sharper eyes than I do, but I find that at best half my shots would be crispy focus. If the subject is large and takes up most of the viewfinder, you can get away with this.
Live view is a life saver. For those who have focus peaking, this will take all the guesswork out of focusing. For those of us who don’t, zooming in on the subject will help. I usually check composition, focus coarsely, and then zoom in on the viewfinder to fix the focus. If you are considering getting a body to fit this lens, a flippable LCD screen will make using this lens much easier. I don’t have one on my camera(EOS Rebel T5) and wish for one every time I shoot. I did find a little mirror to put over my viewfinder, but it is hardly a solution in the outdoors where light is bad.

Aperture decisions

This lens has a nice wide aperture range. Unfortunately, the aperture scrolls continuously, and I find it can be bumped out of place.
I find myself using most frequently apertures between about 11 to the max of 29. Lower apertures in my opinion don’t take advantage of the big advantage of wide angle macro, being able to show your subjects in their environment. In some instances with a far background or something like a thicket, you may want it blurred enough to not be distracting. It is not possible to get tack sharp foreground and background at near macro distances and that is a good thing usually, as the blur helps draw attention back to your subject.

atreee

1/4 ISO800 F11-15 Laowa twin flash. I’m not sure whether I like this shot. Closing down the aperture a tad more would have brought slightly more definition to the background, but with risk of underexposing it. Here the side of the filter is braced against the tree, shooting towards a sunfleck in a dark section of rainforest.

Shooting with this lens outside.

So you’re walking around in nature, and you’ve found something you’d like to shoot, how do you actually go about it?
I’ve found that live view is the best. Turn on live view, and open up the aperture until you can see clearly. Usually this is all the way open. Compose the shot, zoom in, fine focus, and then roll the aperture down to where you want it and shoot! If your viewfinder/live view gets white below say F7, you may want to drop the ISO(or drastically increase shutter speed). In my experience this is a pretty good warning the shot will be overexposed at even the smallest aperture. Just pay attention as you shoot and you will see how your lens/body behave.
In my experience, you can handhold this lens at pretty slow shutter speeds, due to its short focal length. With still subjects, I generally try 1/15-1/25. If I can brace against something(you can even push the side of the lens against things), I’ve found I can go as low as 1/5. I think a monopod that could adjust height quickly would be a great companion for this lens. Faster speeds can be used of course, but at the risk of being unable to expose the background.

IMG_1614wm.jpg

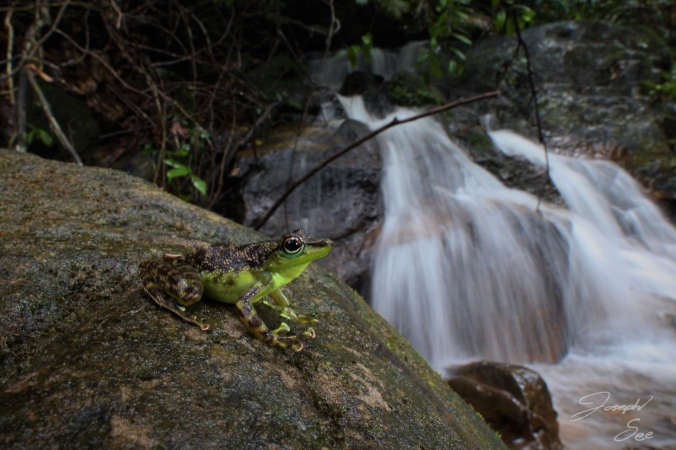
Spotted rock skipper frog.

1/5 ISO800 F20. Resting the lens against the rock(after catching what would be an otherwise uncooperative subject) allowed me to take these photos despite it being a dark rainy day. The slow speed also nicely blurs the waterfall.
I’ve found the best results come from situations where the foreground is dark and the background is brighter. If you are interested in capturing detail in the background, a dark background will black out if your aperture is too small, or simply be indistinct bokeh.


1/20 ISO 800 F18

Two shots of Doria’s angle headed lizard. The first is shooting into the gloom of the understory. The second shot is in the same general area(different lizard), but morning light adds a bit more interest to the background.
For example. If you are shooting a creature in a forest, and you have a choice between composing the shot facing towards a dark ravine, or a sunfleck where light is coming gently through the trees, I’d try to point towards the sunfleck. If the background is overexposed, you can always up the power of your flashes to make the foreground match.
Some creatures refuse to cooperate and will continue going about their business of crawling too and fro as you try to compose a shot. Or even if detained for the picture, are always trying to crawl out of focus.

For slowly moving creatures, I have had some luck with remembering how far they are from the lens. As the crawl, you can track them by looking over your camera directly at them, and guesstimating the distance where they will be in focus. Set your aperture as appropriate. Fire a few shots and you may get one in focus. Easiest to do where there is a set landmark(for example, for creature crawling along a straight twig, you could focus on the twig), then look up and wait for the creature to walk in front of the lens, sliding your camera along for additional shots.
I think there is a lot of promise with using remote triggers with this lens, particularly for flightly animals. I plan to try this soon!

Using flash

First things first, in some conditions you can get quite nice results without the flash at all. It will have to be fairly bright, but somewhat diffuse light, and you will need to stay really still. Of course, no flash is needed if using this lens like a standard wide angle. I find it isn’t very sharp when focused to near infinity. So other lenses would be better for general wide angle work.

anarctiiid1/20 ISO 400 F25ish. It was mid morning when I noticed this arctiid moth crawl up to this leaf to dry its wings. The moth was on the edge of a light gap and the sky partly cloudy, though a beam of brighter light actually shown on the moth itself. No flash needed here unless I wanted to completely unshadow the moths wings.

When I first started out, I didn’t own an external flash, so tried using the popup. The trick to getting decent results is to diffuse the popup flash somehow. I found the simplest solution is to shove the middle of a piece of tracing paper into the gap on the flash when it pops up. Similar designs are on the web elsewhere to give you ideas.


These two shots were taken using a piece of paper shoved into the popup flash.

With this setup, you can get good picture in good conditions, but usually cannot get too close to your subject or you will have lens shadow.

I ended up getting the Laowa twin flash. It is fairly lightweight and offers superb flexibility when it comes to directing the light. The arms do often get in the way in areas with undergrowth, but with some thinking you can get around this. In fact, I found a standard flashgun with a softbox mounted on it much more restrictive, since it ends up being fairly tall.

I haven’t quite figured out diffusion, for now I’ve tried taping pieces of PE foam and tracing paper to the arms and flashes. It looks pretty jenky, and with shiny subjects I do still get hotspots. But it is noticeably better than using them bare bulb.

I find ideally flash is merely to freeze any movement and counteract the shade being cast on the subject by you and your camera rig. So usually, you will be using your flashes at fairly low power. The brighter it is, the stronger of flash you can get away with before you start getting pictures where you can tell flash was used.

awidan.jpg

Ant and true bug mutualism on bamboo shoot

1/20 ISO400 F29 diffused Laowa twin flash.

anursespider

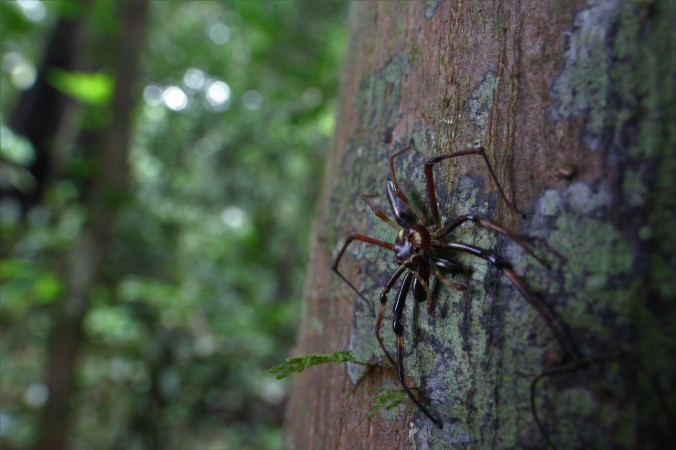
A large riverside light gap provides home to a nurse spider.

1/15 ISO 100 F29.

Flashes were fire strongly in these two pictures to remove strong shadows that the lens would otherwise cast along with the directional light of a clear late morning. This shows the most clarity possible at near 1:1 magnification.(the further away the focus the clearer your background will be at a given f stop).


I think wide angle macro is a great way to tell thoughtful stories of the natural world. I hope this post helps anyone struggling with this lens. I welcome critique and suggestions from readers as well since I am always looking to improve my photos! Happy shooting!


Growing a Hat Garden

Yes, you read that right. A hat garden.

Because, why not?

At least, that is how it started. I wanted to see if airplants could be kept alive on a hat. I took the hat I had at the time(a little cadet cap), and glued a bunch of plants onto it.

20140824_204908_zps32026a58

This thing certainly didn’t win any awards for classiness……..and while most of the plants did survive this, the hat clearly was not a good place to grow the plants long term.

Which taught me a few things. Eventually, when I decided I ought to get a different hat, I actually chose it with keeping plants alive on it in mind. This eventual plant hat lasted for a few years before I was forced to take it apart so I could travel abroad with the same hat. Many of those plants are still growing, including a few that grew up on the hat.

12797576_619711758183036_852025441_n

Tillandsia aeranthos varieties coming into bloom on the plant hat.

14677258_1614261498869054_1458161471669141504_n

Full shot of plant hat at Golden gate park, SF.


14723157_1449055411790353_2440624971362336768_n

The plants even got to go to various events that typified 2016.13392761_1203705716352941_674654847_n(1)

(they probably miss this guy)

So could carrying your plant friends with you become a trend? I don’t think so. But I certainly had great fun with it. What better way to relax on the MUNI than to see how your plants are doing? It certainly was a conversation starter as well. And I learned quite a bit about plants on the way. So here I will give you the recipe to constructing a plant hat of your own, if you wish. And if you do, please share this and let me see it! I can’t say I am the first person to try this(their was a photo on the internet of someone from the Bromeliad society of Southern California who had something similar), and a few people construct fascinators or hats using plants as ornaments. The difference here is that the plants are not mean’t to be just decorations-they are meant to survive and grow full-time on the hat. It is a fun way of growing plants-a hatbitat…if you will.

Choosing a hat.

Not just any old hat will work for keeping a hat garden. The hat needs to have several characteristics

-wide, stiff brim: This protects the plants from being bumped, and gives you space for the plants. This was the major issue with the cadet cap.

-not get super hot: Lighter colors(not black) are going to be best

-Allow you to securely attach plants to the hat.

With all these things in mind, I ended up settling on a vented mesh drover hat. The exact hat is a barmah canvas drover with vented mesh, but any similar hat should work.

Plant Placement

To attach the plants, I could use anodized aluminum wire(can be had online, get it in fairly fine gauge so it will fit through the vents-airplant dealers often sell it but they may sel a thicker gauge). One end is twirled through the rosette, the under end goes through the mesh(in and then out again a couple inches away-with the end bent flush against the hat works great). This holds the plants in place long term, and also allows you to move them around on the hat if you want. In placing plants, you need to think about where on the hat they will do best. You don’t want to put plants in places where they will be bumped excessively and damaged(the very front, say). You also want to make sure that the plants don’t have lots of leaf touching the brim. The brim heats up in hot weather, and this can burn leaves touching it. This brings us to the most complicated part of this.

Plant selection

Not many plants are actually suitable for long term life on a hat. Those that are will be

-small/squat and sturdy

-do well in dry, airy environments

-Epiphytic

Some of the airplants fit the bill, such as…

-Tillandsia aeranthos:

14360038_541120106088102_5810911685711495168_n(1)

Their are many forms of this species, and only a few are really suitable for hats. Many are too long and lanky. There is one form that stays fairly squat(more of a rosette than a stem)that works well. Tillandsia aeranthos ‘mini purple’ is perhaps one of the best plants for hat life. It stays small, is very hardy, and is quite attractive with dark foliage. The flowers or aeranthos are a nice bonus, pink bracts with purple flowers. Tillandsia aeranthos ‘bronze’ ‘minime’ etc. are tiny varieties that work well up closer to the front, they are fairly sturdy plants of dimunitive stature but do not bloom. If you were to try one plant, this should be it.


-Tillandsia neglecta

If you can get a small variety, the hard leaves and toughness of this plant make it another good one to try.

Tillandsia argentina

-Another small hardy airplant, though somewhat less so than the first two. I’ve managed to overwater

Tillandsia pruinosa

-I tried this species on whim, and was quite surprised. However, again, you have to get a small clone with thick leaves. They also need to be planted under other plants. You can use aeranthos to provide some shade to pruinosa planted underneath them. In this picture the pup was grown while the parent was on the hat

14553160_111383542664381_6829850384144531456_n

Orchids

With 10,000 species of orchids, I figured some must be able to survive the conditions on a hat. If trying orchids you will have to remount them. The best material for mounting on hats is scrubbie pads cut to shape, perhaps two layered on top of each other. You can use aluminum wire to wrap the orchid securely to the new mount, and then use multiple attachment points to secure it to the hat. Make sure the mount does not bend or shake or this will damage orchid roots.

Orchids that have done well

-Dockrillia rigida: One of these was on the hat for almost 2 years, during that time it doubled in size.

Dockrillia cucumerinum: The odd cucumber orchid is even more dimunitive and hardy than the first suggestion

14705069_1680948098887925_268671060725989376_n

While somewhat more delicate, I also had success with Isabelia virginalis, which flowered after a couple months on the hat.

15034985_1142515975828701_2984118576903880704_n

Hat care

The plants on the hat are pretty much comfortable when you are. Most of the time I had the hat I was living in California, where temperatures would range between about the mid 90’s down to freezing. I wore the hat out with me pretty much daily. However, I did try to avoid all day sun on very hot days(though I found with acclimatization the plants seemed fine). To water the plants, I would simply spray them down thoroughly with a spray bottle, anywhere from daily to every few days. It is great fun to water and inspect the plants, and you are definitely not going to forget! Fertilizer can be done by spraying the plants with dilute liquid fertilizer for orchids or Tillandsia.


That is pretty much it! If anyone gives this a shot, I’d love to hear how it goes.


Just the right amount of dumb adventure, finding phantasmal poison frogs and Tillandsia tectorum in Southern Ecuador

As I wandered down a dusty dirt road that led to who knows where, under power lines covered with air plants, I had to wonder why this was my idea of a good idea-couldn’t I just be on a normal vacation and relax on the beach-or go on a proper excursion to an actual destination? The dry slopes of the Yunguilla valley are dotted with thorny acacia trees, houses, corn fields, and banana plantations, perhaps one of the last places you’d expect poison dart frogs. But they must be here somewhere.

The Phantasmal poison frog

anthonyi_zps5ed643b6

Epipedobates anthonyi from Santa Isabel(in a terrarium)

Epipedobates anthonyi, the phantasmal poison frog, is a medium sized dart frog found in the Northern departments of Peru, and Southern Ecuador(check Amphibiaweb.org for a more accurate range description). This little frog gained brief fame for its skin toxins…one called epibatidine turned out to be a painkiller more powerful than morphine-the problem was no one could figure out how to make it less toxic-so to my understanding all research on this potential drug has stopped. This frog is very popular among poison dart frog keepers, it is colorful, fairly bold, and has a beautiful call. Indeed, I kept them for a few years. Several different populations are in the hobby, perhaps the most commonly kept are frogs from near the town of Santa Isabel, Azuay Ecuador. Santa Isabel is 2 hours by bus from Cuenca. Now some pictures of the area do exist on the internet, but nevertheless I wanted to go see this frog in its habitat myself.

Arriving in Santa Isabel

After a lengthy bus ride, passing the town of Giron with its popular waterfall hike(which I elected to skip because I felt the elevation would be too high for dart frogs), I arrived in Santa Isabel. The bus ride was breathtaking, as we dropped into the Yunguilla valley, filled with deep gorges and dramatic vistas as one expects in the Ecuadorian Andes. However, their was one worrisome thing and that was how little blank land there was. Even on inclines there were houses, farm fields, and pastures. According to the literature the frogs can survive human altered habitat, and this is lucky because their is little natural left close to the highway. After getting a ride down to the highway from town, my plan was to find a fairly untouched area to snoop about in.

I found a dirt road outside town and walked down it for a ways, and it seemed as far as the eye could see were homes. Discouraged, I managed to hitch a ride back up to the highway and back to the main intersection for town, where I pondered if I should abandon the plan. I considered instead using the day to go look for a certain airplant that grows a ways past Santa Isabel-but that would have required a taxi ride. Discouraged, I walked along the highway past an assortment of shops and noticed a sign for Sulupali desert. It turns out this is a large blank area people ride dirtbikes in. But it meant to me the possibility of an easily accessible town edge. I started walking down this road.

Eventually I reach a fork in the road where visible on one side was a canyon with gentle walls. Their were corn fields, pastures, and I was debating whether to keep going or turn around when my eyes picked up this.

IMG_4803_LI

Do you see anything of note here? Notice how dry the surrounding landscape is, too! And this is the rainy season…

IMG_4723

Between a banana patch, a plowed field, and some remnant forest was a reed bed! Further off in the valley was another green strip, obviously a moist area. And even from the top of the canyon, I heard something familiar. Cupping my ears I recognized the bubbly, birdlike trill that had woken me up so many times at 5 in the morning. So they ARE down there! I knew these frogs were loud-but I was amazed I could hear them all the way at the bottom of this canyon. I also heard another frog that confirmed the reedbed was not dry (more on that later). I started down the trail.

IMG_4708

The slope where no agriculture had occured was lightly forested with thorny acacia trees, no more than a few meters tall. On flat ground grasses and herbs grew under them, on the slopes they were frequently rooted in no more than loose soil.

I scrambled down the sloping trail, skipped across a cornfield, and then picked my way down into the banana patch that bordered the reed bed. While their was running water, all the calling was coming from areas of quiet water. Even a grassy puddle in the open with a few cow patties nearby had at least 3 males calling.

IMG_4795

Another reed bed in the valley that also had phantasmal poison frogs in it. The valley’s hydrology is highly altered, it is likely these wet habitats were once much more extensive.

Most of the phantasmal poison frogs called back and forth from within the reed bed. A baritone groan revealed that the dart frogs were not the only ones here.

IMG_4721 
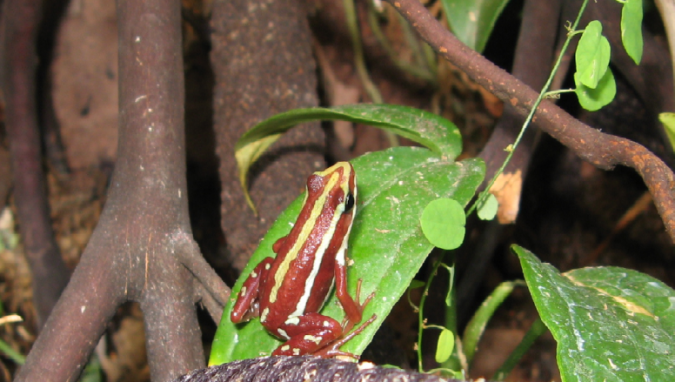
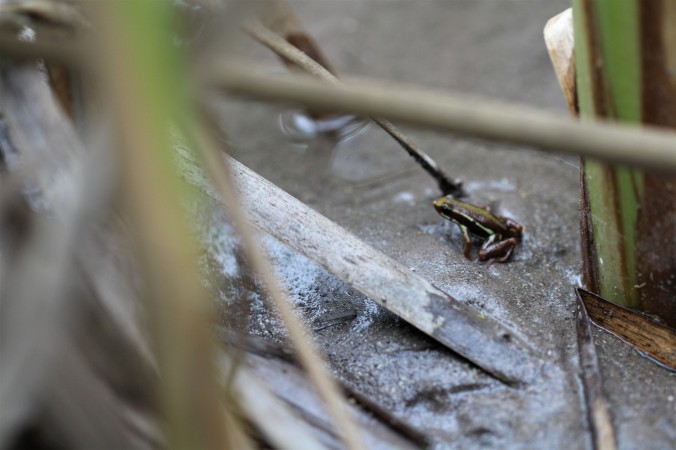
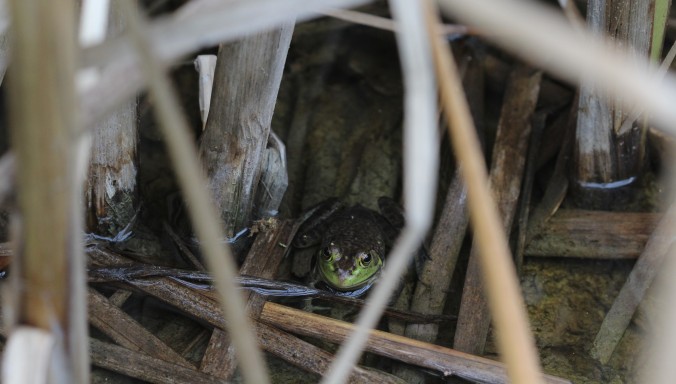
An American bullfrog. I saw quite a few in the same reed bed as the dart frogs. It would have been interesting to have either killed one and looked at the stomach contents or to see if the bullfrog would eat a phantasmal poison frog. While phantasmal poison frogs are toxic-they do gain the toxins from their diet. It is possible these dart frogs in this altered environment lacked chemical defense from these predators. Juvenile phantasmal poison frogs are also not red in color, taking over a year to fully develop this coloration. So it could also be that juveniles are less toxic and could be edible to the bullfrogs.

Seeing dart frogs tends to be more difficult than hearing them, but eventually peering into thicker areas of the reed bed I was able to spot some. Perhaps they remain in cover to avoid the bullfrogs who are in more open areas.

IMG_4719

Epipedobates anthonyi in situ near Santa Isabel.


One visible in the picture on the left, picture on the right shows some sort of Commelinacaeae(possibly Tradescantia?) in an area where the dart frogs were.

I haven’t gotten any great shots of these frogs. I’d also like to see them in a more natural habitat, and locate a calling male. But that is all for another day.

Satisfied for the time being, I prepared for the climb back to the road and the bus ride back to Cuenca.


A few days later, I was again poking around in Santa Isabel, this time staying with a retreat center there, which I arranged to trade a few photos for a place to stay.

To the West of the city the valley dries even more, turning into a fairly barren desert. One plant in particular interested me, the fuzzy airplant(Tillandsia tectorum). To get there, I hopped onto a local bus towards the coastal town of Pasaje and told the confused driver to let me out at a promising spot. Mats of silver grey Tillandsia could be seen from the road. I ended up hitching a ride back a ways to the new gas station and nightclub. Here, even in the canyon behind the nightclub the plants were growing in abundance.


IMG_4959IMG_4838

Now poison dart frogs would be the last thing you might expect in this hostile environment. However, some of the slot canyons leading to the Rio Jubones had small wetlands in them. And, stepping around cacti, one could clearly hear the frogs calling! If you look closely at this picture, you can spot both Tillandsia tectorum and lymani on the slopes above the wetland. A few small acacia have rooted in the wash.


However, the most surprising habitat I found was while walking around town, in Yunguilla. I heard a bunch of trilling and it led me to the restaurant with a series of water features-filled with dozens of these frogs!

IMG_5291

While many ponds people had put in housed mainly bullfrogs, and many native frogs are very sensitive to disturbance, it is clear that at least this species can be helped by creating habitat in people’s back yards.


Overall a very successful trip!

IMG_48381


Seeing marine iguanas on the Galapagos

I must first write a rather sobering note. Tourism, and therefore human impact on the Galapagos is growing quickly. However, oddly I met many tourists who seemed to be there only to get a selfie with a sealion, chill on the beach, and showed hardly any interest in the wildlife for their own sake. I found this a bit saddening to say the least. For those who are interested in the particular aspects of the natural history of one of the most iconic Galapagos animals, this info is for you. I spent a couple weeks on the islands, part of the time TA’ing a field course.

A little bit about the marine iguana

Much has already been written on the internet on these unique lizards. Descended from iguanas that rafted to the islands millions of years ago(presumably these first iguanas were closely related to the modern day Ctenosaurs that you see on the beaches in the tropics today) they are the only truly marine lizard in existence today. Marine iguanas are found through the Galapagos islands, different subspecies have evolved over time in different regions of the archipelago. The females and juveniles feed on algae intertidally, but the males will swim out to feed in deeper water. Between the months of January and March is nesting season, when you can observe the females digging in suitable areas, often many iguanas will be seen squabbling and digging in suitable spots. I’m going to go through what I saw island by island so those interested can plan accordingly.

San Cristobal

San Cristobal is one of the two island’s with an airport. San Cristobal definitely gets less traffic than neighboring Santa Cruz. Marine iguanas are very visible on this island.

Waterfront: In the planters on the way towards the coast guard dock marine iguanas can be observed nesting at close range. Female iguanas will head bob, fight, and dig their nest holes here during the right time of year.

IMG_3446.jpg

Female marine iguana from San Cristobal island

El Loberia: While the best place to view the lobos marinos may well be at the waterfront where during my visit pups could be observed suckling, the sealions do indeed frequent the beaches and tidepools of El Loberia. There is a trail that heads towards a cliff, a good place for swallowtail gulls. It is a rather rough trail as much of it is through a boulderfield of lava rocks. Here, lots of large male marine iguanas can be found sunning. This was a great place to wait and watch the sunset with these majestic animals.

IMG_3505IMG_3881IMG_3840 (2)IMG_3817 (2)

Santa Cruz Island

The most populous and most visited island on the archipelago, many people’s Galapagos travels begin with this island, after landing in the airport on neighboring Baltra Island. There are quite a few sites on this island that I did not get to, but I will have to put in a note for one spot in particular.

Waterfront pier: We saw several iguanas swimming from off the pier. Also, at low tide the flat rocky outcrops provide opportunity to observe female and juvenile iguanas feeding. All kinds of other cool stuff(baby blacktip reef sharks, cownose rays, etc.) can be seen from the pier as well.

Tortuga Bay: About an hour walk out of town, Tortuga bay is a mangrove lined inlet, across from which is a expansive beach with powder fine white sand-a preferred place for surf lessons on the island. Lots of large male marine iguanas can be found snoozing on the rocks and sand on the oceanward beach of Tortuga bay. I also observed some nest holes on the back beach(along with the nests of the Galapagos green turtle). This would be a good potential area to observe the big males swimming through the surf to feed.


IMG_3364

Isabela Island

If you are really into marine iguanas, you should try to visit Isabela Island. A 2 hr or so  boat ride (50-60 round trip, ask around) will get you there. This island is by far the biggest in the archipelago, but the town of Puerto Villamil is rather small, maybe a couple thousand inhabitants. It seems their is new construction everywhere, as this island receives more and more visitors. rooms can be had for as low as $15-20, and a few days is really required to explore all that is easy to see near this town. Arriving on the dock you may spot marine iguanas swimming in the bay, and invariably laying on the boardwalk.

Waterfront: The pier with a restaurant on the end that juts out from the beach in town is the best place I’ve seen so far for observing female and juvenile marine iguanas. Show up early in the morning, and dozens of pudgy babies will be sunning themselves on the brick walls of the restaurant. At low tide(check a tide chart), the iguanas descend onto the wet rocks like so many crabs to nip at the algae. Further down the beach past many beachfront hotels is a beachside bar…the rafters of the bar provide haven for dozens of small marine iguanas who can be seen crawling up the wall at sundown to sleep.

IMG_4145

Concha y Perla: A boardwalk leads away from the landing through a mangrove forest to what is essentially a giant kiddy pool made of lava rock. I talked with some girls who had gone snorkeling here the day that I arrived. They said something along the lines of “the snorkeling was so so, and you had to watch out for iguanas.” Wait what?? You can swim with the iguanas? I know where I am going tomorrow.

After picking your way over the sea lions sleeping on the boardwalk you can then enter the water from a nice wooden platform(also shared with sleeping sea lions, and often a marine iguana or two). Marine iguanas bask on rocks around the pool, and can be seen starting late morning swimming either out to the bay to feed, or back from there to rest on the rocks. While they are swimming on the surface they seem to be basically on autopilot, so you can swim along with them without disturbing them.

Islote Tintoreras: A visit to this island is offered as part of the Tintoreras(white tipped reef shark) tour. This relatively flat expanse of mostly lava rock has a immense number of nesting female marine iguanas. I’m not sure if females will swim to reach better nesting sites. Here you will often see female’s digging nests up close(in the trail), and you pass at a distance by the main coarse sand beach where the females are gathered.

IMG_4011.jpg

Female Isabela island marine iguanas(A. c. cristatus) compete for space on a nesting beach at Islote Tintoreras

IMG_4026

Juvenile A. c. cristatus

Floreana

The smallest island community with only a couple hundred people here, Floreana has a lot of interesting human history(the rest of the islands are uninhabited). The subspecies of marine iguana that occurs here(A. c. venustissimus) is distinctive in that the males show brighter colors than other marine iguanas. Some show a turquoise blaze on or below the dorsal spines. Many are covered in patches of red and green, and frequently have black blotches. Perhaps we can call them calico iguanas?

IMG_4517 (2)IMG_4416IMG_4534 (2)IMG_4423

That’s it for now! If you have spent time on the islands and have suggestions, feel free to share! I’d be particularly curious if their is anywhere where male marine iguanas can be reliably seen feeding.


Wild imitator around Tarapoto

38019592814_4fcb0dbf71_k

“Blrrrprprprprprt!!”

A cricketlike trill catches my attention. It was a happily familiar sound, one that I had woken up to many times. I stop, and peer quizzically at greenery along the trail.

Ranitomeya imitator, the imitating poison frog.

I had made an impromptu side trip up to Tarapoto to look for this frog. As I followed the sound, one thing became frustratingly apparent. Hearing the frog was one thing, finding the little bastard was going to be another. In this little blurb, I will give some advice on what I learned should you end up in Peru and wish to see these frogs in the wild.

Tarapoto

Tarapoto is the largest city in the San Martin Department of Peru, located in the North of the country. It straddles the divide between the Amazon basin to the East and the Andes to the West. To the East of Tarapoto, close to the village of Chazuta runs the mighty Huallaga river, known by name to dart froggers around the world. The region, particularly the upper reaches, once produced large quantities of coca. Perhaps due to programs encouraging farmers to switch from coca to cacao, San Martin leads Peru in the production of chocolate. It also leads in the amount of forest cover lost.

Getting to Tarapoto

There are a few ways to get to Tarapoto from Lima, the navel of this South American country. Perhaps the most “interesting” way to get there is via bus. Unfortunately, Tarapoto is basically the other way from most of the other tourist destinations in Peru, for example, Cusco. For nature lovers, the Northern part of Peru is nice and less traveled. You could squeeze in side trips to Peruvian beach towns, and Tarapoto is fairly close to Chachapoyas, where the Marvelous spatuletail hummingbird occurs, as wells as Gocta falls and the Kuelap ruins. You can also go from Tarapoto to the Amazon river via Yurimaguas to reach Iquitos and other river destinations. Movil, a well known bus company in Peru, has the most extensive coverage of Northern Peru, and to my knowledge is the only major company to cover the route. The 26 hour trip takes you up the coast of Peru, practically to Trujillo, and then turning East over the mighty Andes mountains. First the drier scrubby side facing the Pacific, through highlands grown in with Eucaltyptus and maize, and finally descending through several types of cloud forest to “seha de selva” the local name for the mid altitude forest type that surrounds Tarapoto. Bus travel in Peru is quite luxurious in comparison to the US, but with the longer bus rides still exhausting. I have a sliver of a memory using the bathroom at a stop somewhere late in the night, the whole floor of this lit building hopping with crunchy crickets and of course lacking toilet paper if you happened to need it(always bring a roll with you!) My bus got stuck behind a landslide so the trip in fact took about 36 hours in the end. I opted to go to the quieter capital of San Martin, Moyobamba, to rest and explore for a day before going to Tarapoto. Moyobamba is nice, and quiet (I highly recommend the orchid and hummingbird garden), but I didn’t have any promising leads of undisturbed forest hiking trails to encounter frogs. I’m sure they are around, but I decided to head for Tarapoto

Tarapoto(Taramoto)

Upon arriving in Tarapoto, I was a bit nervous I had bitten off a bit more than I ought to chew. Some locals jokingly call it Taramoto, and that is because the city has absolutely sold out to the motocarro, which looks like a motorcycle and a pedicab had a baby. In the city, a changing light immediately unleashes a stampede of these motocarros, as if you are in a permanent game of Mario Kart. I felt quite safe in this city however, the locals being very inviting. I stayed at Hostel Colibri, where I met some other friendly travelers and enjoyed the delicious breakfast. But their are accomodations for just about any price.

The great thing about Tarapoto is that their is a good mixture of places where you can do guided tours, and a good number of places you can go by yourself as well. The list here is by no means exhaustive.

A quick cautionary note on the forest in this area should be had. If you have never been in the jungle, it may be a good idea to go with a guide to point out possible hazards as well. Wasp nests, bullet ants, spiny palms, and of course water can all catch the uninitiated by surprise. Long sleeves and pants are a must, as is good insect repellent, particularly for the first two locations.

Reserva Alto Chiclayo

Located at the end of Prolongacion alerta(past Centro Urku and Musa verde lodge) is this reserve. To enter the reserve, you must be with a guide. I visited the day before, and arranged for a guide the next day(approx. cost 76 soles). You can take a motocarro here, or at least to the foot of the road to walk the rest of the way in, which is interesting in itself, it passes through some secondary forest, and I did see a group of titi monkeys along the road…a species that does well in disturbed habitat. You could probably also do this through the tour agencies around the plaza de armas. Boots are provided, and these are pretty much a must for hiking here as the trails get quite muddy, but even these boots become incredibly slippery and the trails are steep. Our guide was able to locate not only Ranitomeya imitator, but also Amereega bassleri and trivittata. Supposedly fantastica(a black white and orange form) are found here as well.

18766428_10212339482657760_3410224861419293052_o

Huacamillo falls

This waterfall is well known to the locals, and tour agencies will guide hikes here as well. However, you can hire a motocarro to take you to the trail head, climbing up a hill and going across a rickety wooden bridge to a trailhead. The actual waterfall takes several river crossings to reach, but I was not interested in the waterfall. At this site I observed imitator, as well as Amereega trivittata. Their is a booth a little ways in where they collect a nominal 3 sole fee. You can find frogs literally meters from the trailhead, but the river beyond the control point is interesting enough to be worth a few soles. The trail winds past some Ayahuasca retreats before going along the river. If you are a butterfly enthusiast, this trail is a good one for butterflies as well. They puddle along the river in numbers and a couple of the retreats have fruit trees nearby that pull in a few species of butterfly.

Tunumtunumba falls(Chazuta)

18815056_10212352165414821_5568133234416959712_o

The rugged terrain of the Eastern Andes sloping to the jungle gives rise to many waterfalls in the area. Tunumtunumba must be one of the most impressive. The trailhead is located on the outskirts of the town of Chazuta, about an hour’s drive from Tarapoto. To get to Chazuta from Tarapoto, ask a motocarro driver to take you to the paradero por Chazuta. Here drivers will loudly coax just about anybody into personal vehicles that act as improvised public transit to the village(as if a trip to Chazuta is a spur of the moment decision), commonly known as collectivos in Peru. I think the cost was 10 soles each way. My first trip here, which was my first Peruvian collectivo experience, was entertaining. Along with a friend and as many locals as could be fit into the car, we had aluminum flashing tied on the roof, a few sacks of potatoes, tools, boxes, a box of chicks, and a few chickens that ended up wandering free in the trunk. On the way, the car overheated, and the driver revived it enough to limp us into Chazuta by pouring water from a roadside stream into the overheating radiator. Chazuta is located on the bank of the lower Huallaga river. The trail, aside from the trailhead(ask for directions to it) is poorly marked. You first walk past various small family farms(chacras), each with a trail leading into each. Following the biggest trail will keep you on the right track, their are also a few rain shelters along the way. On the edges and between the farms is secondary forest of various ages. Eventually after crossing a couple tiny wood bridges you reach a fork, one fork heading left straight up the mountain away from the river, a smaller one continuing straight. Follow the very muddy uphill to a ridgeline where you will see many cacao plantations. The trail then takes a left fork downhill(there is a final rain shelter a little ways past this intersection) and drops down the side in a series of steep switchbacks to the banks of a beautiful, clear flowing section of the Rio Huallaga, with some sort of concrete dam visible a little ways upriver. If you can see the waterfall from the ridge, you have missed the fork and will soon drop into some of the darkest forest I’ve seen, interspersed with fresh clear cuts and eventually arrive at the river bank further downriver- we ended up next to a little shack in the middle of a small cacao plantation next to the river, complete with free running livestock. I am unaware of any protection for the forest here, it seems at the rate it is being cleared soon the only forest will be on the very steepest hillsides.

With any rain these trails become incredibly slippery and difficult, take caution. My first trip here we came across a Peruvian group that i think was a tour. One person had sprained his ankle in the river and was being carried out up the switchbacks on a stretcher made of sticks. At one point a couple of his friends carrying the stretcher slipped and fell and nearly dumped him off the stretcher. One of the men saw our predicament and cut us some walking sticks…I am honestly not sure if we could have climbed back up the switchbacks without these!

I never actually went to attempt to reach the falls, but you get nice views of them along the trail in a few places. I have seen Amereega trivittata here, another Amereega species that eluded capture, and the Chazuta form of Ranitomeya imitator. On this trail, the imitator start becoming noticeable once the chacras are no longer so close to the trail. Plan to be back to the collectivo stop in Chazuta by the late afternoon at the very latest…I never had an issue with getting a ride back to Tarapoto, but with the informal nature of the service it is possible. Chazuta imitator are delightfully variable. If you were looking for a jungle lodge, a lodge known as Pumarinri is not far from Chazuta, and apparently has very similar frogs on their property.

18839521_10212352169214916_2089211648385070336_o


Finding imitator

Their are two things you must be able to do before you have a good chance of finding these frogs. First you must recognize the call, then the plants they use. imitator in this area use mostly a species of Dieffenbachia, but will also use a species of Heliconia. Both these plants grow in clumps where you can often find several imitator in succesion. The males call from the water filled axils, but while looking for a male you will often find other frogs(presumed females, they are usually quite plump) moving about the plants. Here are some in-situ shots of the frogs, and the Dieffenbachias in the dark understory. One interesting thing is how they often use dead branches and canopy debris to move from one Dieffenbachia to another.

18815157_10212352147174365_3193155256843451564_o


18814944_10212352151294468_4021396107517880461_o.jpg

18839644_10212352182295243_3991617792953814902_o


18815421_10212352184615301_1593911680108719358_o


Friaje

Brrr.

In the Peruvian Amazon, I never realized I’d need fluffy blankets. I snuggle deeper into the inadequate warmth. Is the jungle broken? It is the second day of a bizarre weather phenomenon known as a friaje. A mass of cold air that surged North from the Antarctic now sits squarely over a formerly steamy rainforest.

The next morning I bundle up before leaving the house. It is cool and crisp, and I have light sniffles. With grey haze overhead, it feels a lot like San Francisco.

IMG_20170718_145425_587

The mercury got down to just under 9 Celsius(that is 48 degrees F) in the insulated forest that night, it probably got even colder in the field. That day, the even as the sun poked through the temperature struggled to close in on even 20 degrees Celsius.

The first day of a friaje, everything is eerily quiet. However, today, a few animals stir. A couple groups of aracaris run about in the trees. Macaws and parrots wing overhead, their harsh cries pierce the cold morning.

Physiology forces many creatures to quietly wait

20229661_10212902873302174_8816242513242931939_o

I found this Plica umbra by putting my hand on it. All it could do was stiffen like a board and hope not to be spotted.


We also found two rainbow boas within 24 hours before the friaje hit. One basking at noon on the trail, another on the crawl in the cool of night. Perhaps to safe hidey holes only boas know

IMG_20170827_112012_754